
Require in batches
The Batch Request feature allows you to send a document to multiple recipients at the same time, each of which must be completed via a form.
It will also allow you to customize the required document for each recipient. That is, the document sent to each recipient will be pre-populated with the fields configured in the .csv file.
To send this message, we'll use a .csv file that will import both the recipient's data for the message and the PDF document fields we want to customize. This way, each recipient will receive their personalized document.
To use this option we must have the document to request as a "Template".
File configuration .CSV
When making a Request in batch, the system gives us the option to download an example CSV file.
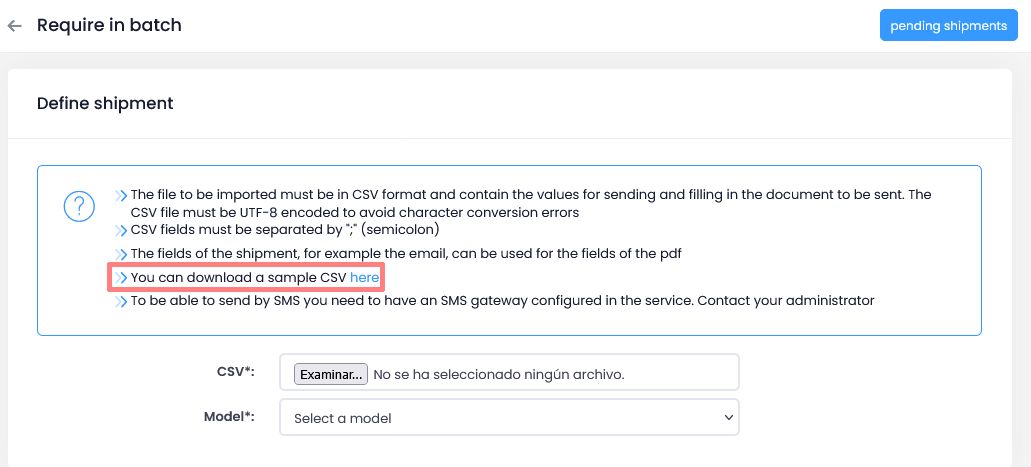
The first row of the .csv file should contain the fields required for sending the document and some optional fields that will allow you to customize the PDF document sent to each recipient.

Fields for submission:
- Name: recipient's name. This can be completed with the first and last name.
- Identifier: Recipient ID (NIF, VAT, RUT, etc.). This will be used for electronic certificate authentication. If the recipient has this type of authentication, the certificate used for authentication must contain the NIF indicated here.
- RestrictIdentifierForSignature: This field is optional. It restricts the electronic signature to a specific NIF (Tax Identification Number), meaning the signer must sign with an electronic certificate that contains the NIF indicated in this field. If you use a certificate that doesn't contain the NIF indicated, you won't be able to sign.
- ShippingMethod: method of sending the communication. There are two ways to send the communication: email or SMS.
- Email: of the recipient. This will be used to send the communication or the access PIN when sent by email.
- MobilePrefix: mobile prefix of the recipient's country.
- Mobile: Mobile phone number. This will be used to send the communication, or the access PIN when sending via SMS.
- Lang: language to be used for communication.
- AccessType: type of access or authentication required to access the document.
- PinSms: When accessing the sent document requires authentication via a PIN sent via SMS. The possible values for this field are:
- 0 -> no SMS pin required.
- 1 -> requires SMS pin.
- PinTelegram: When accessing the sent document requires authentication via a PIN sent via Telegram. The possible values for this field are:
- 0 -> no telegram pin required.
- 1 -> requires telegram pin.
- PinEmail: When accessing the sent document requires authentication via a PIN sent to email. The possible values for this field are:
- 0 -> no email pin required.
- 1 -> requires pin email.
- ExternalIdentifier: external identifier. Optional field.
Fields to personalize the PDF document for each recipient
In this case, the fields will depend on the data to be customized and the template used. If the template we're using has fields that can be customized for each recipient, the field name must be the same as the template name. In this case, if the field names indicated in the .csv file match those in the template, the system will automatically detect them. However, if the names we have configured in the .csv file do not match those in the template, they can be manually associated when configuring the require.
In the proposed .csv example, the field names to customize the document are: datopdf1, datopdf2, datopdf3, datopdf4
If these fields match those indicated in the template, the system will automatically detect them.
The data included in "Fields for Submission" can also be used to personalize the PDF document.
Finally, if we use Excel, we save the file as a .CSV (comma-delimited) (*.csv).
If we use Libre Office Calc, we save the file as a CSV Text (*.csv) with the field delimiter ; (semicolon).
How to perform a Batch Request
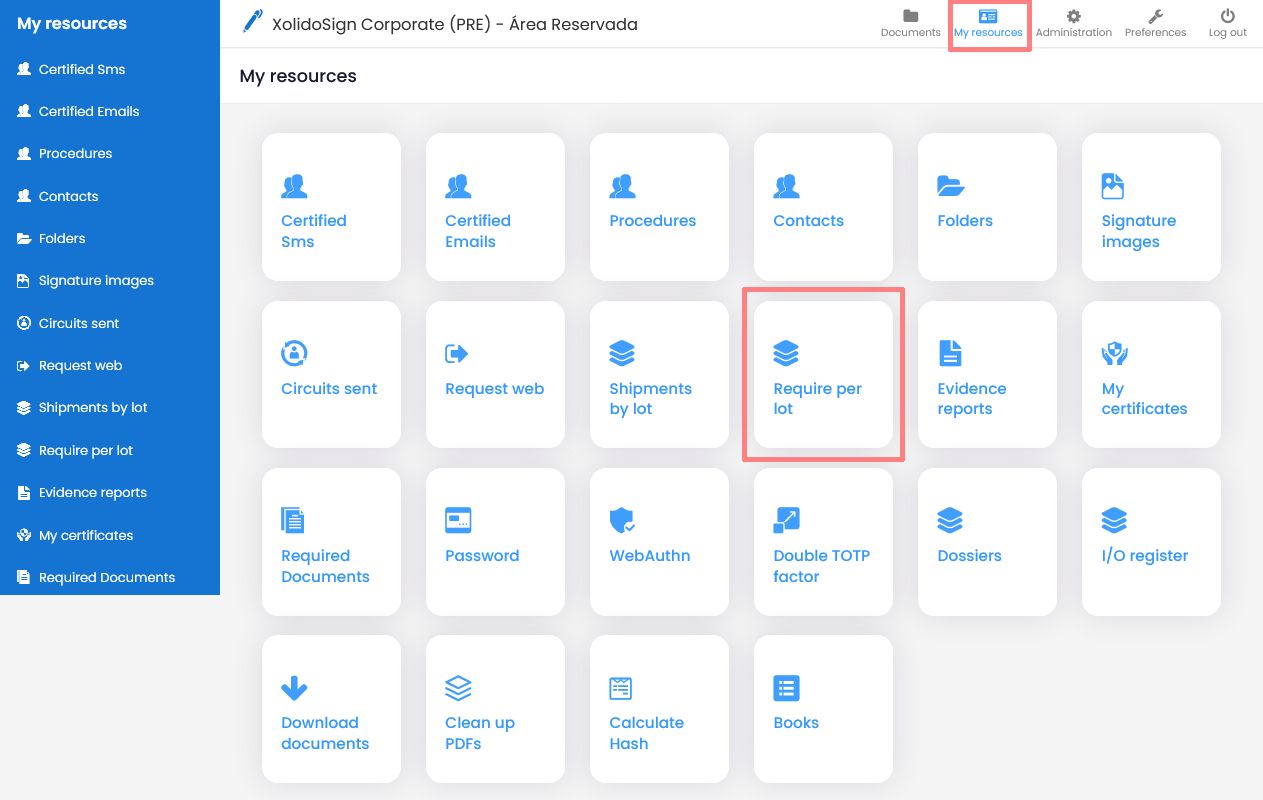
Once we have the .CSV created, we click on My Resources > Request by batch.
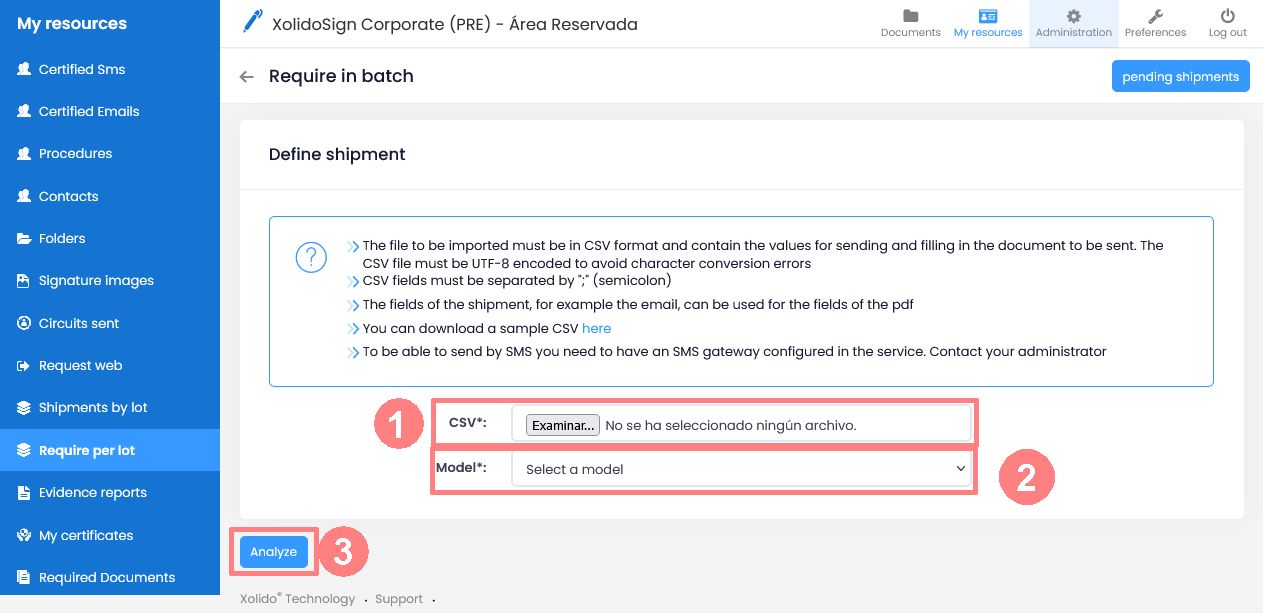
On the Request by Batch page, click on New submission to request document and follow these steps: Before these steps we have to have the .csv file configured and ready to use.
- Click on "Browse" to select the .csv file.
- We select the model that we are going to require in batch.
- Click on "Analyze".
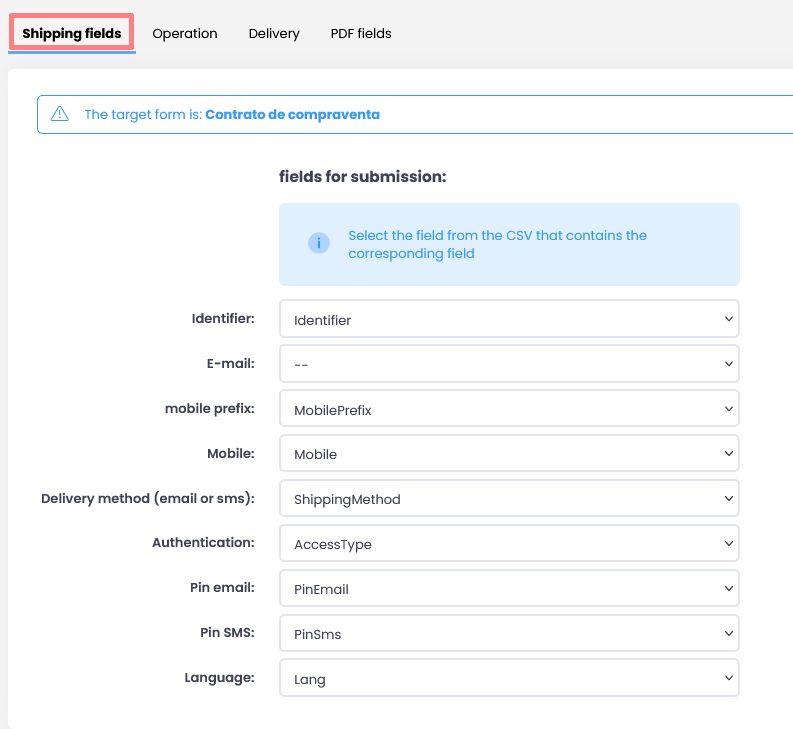
- Next, we configure the fields for the submission. If the default field names in the .csv file have been maintained, the system will automatically detect them. If they have been modified, they will have to be associated manually.
- Click on "Save".
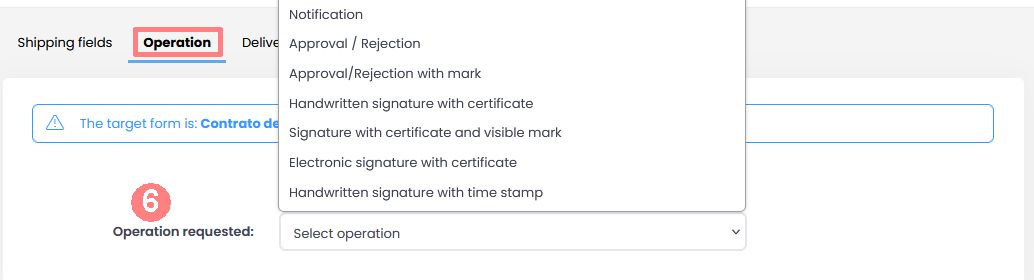
- In the "Operation" tab, we select the type of operation that will be required from the recipients (signature, approval, notification, etc.). If the operation to be requested is a signature or approval with a visible mark, we can configure its position.
- Click on "Save".
- In the "Sending" tab, we configure the email subject and text, the Sender Entity (if we have more than one), associate the documents generated in a specific folder, and associate a transaction cycle that would begin when the recipient completes their transaction. Fields from the .csv file can be used in the email subject and text. For example: Subject: Sending to: |email|, where "email" is a .csv field.
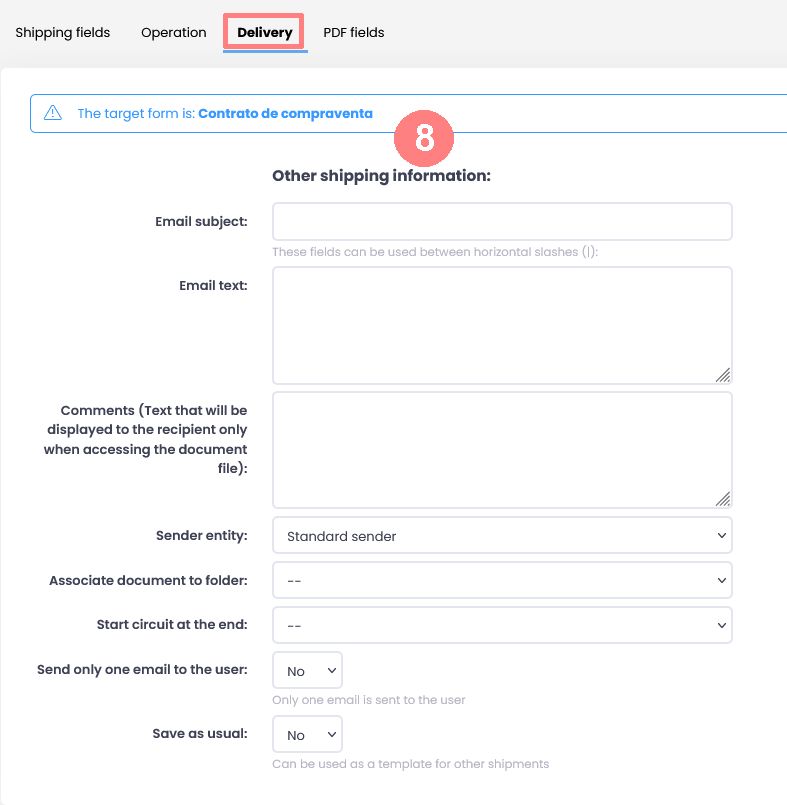
- Click on "Save".
- "PDF Fields" tab. If the field names in the template used match the field names in the .csv file, the system will automatically detect them; otherwise, they can be manually matched. These fields will be used to personalize each document sent to each recipient.
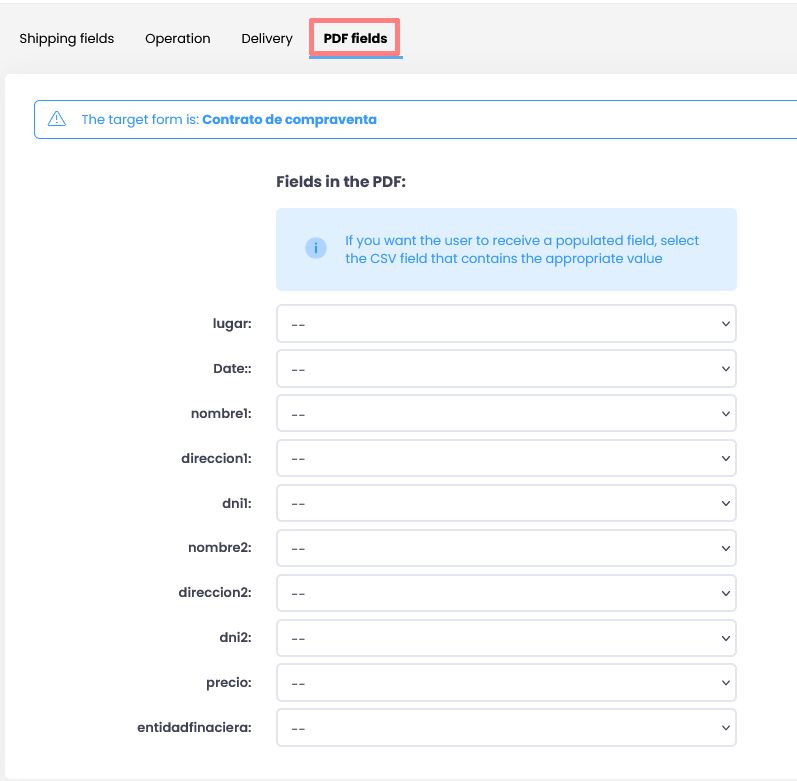
- Click on "Save".
Once you have configured the Batch Request, you can send it by clicking the "Send to all pending recipients" button.
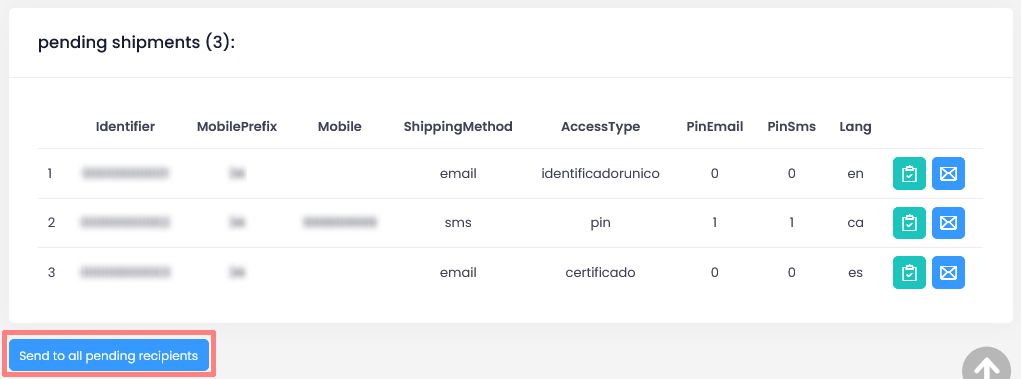
You can also send to each recipient individually by clicking on the envelope icon that appears on each recipient line.
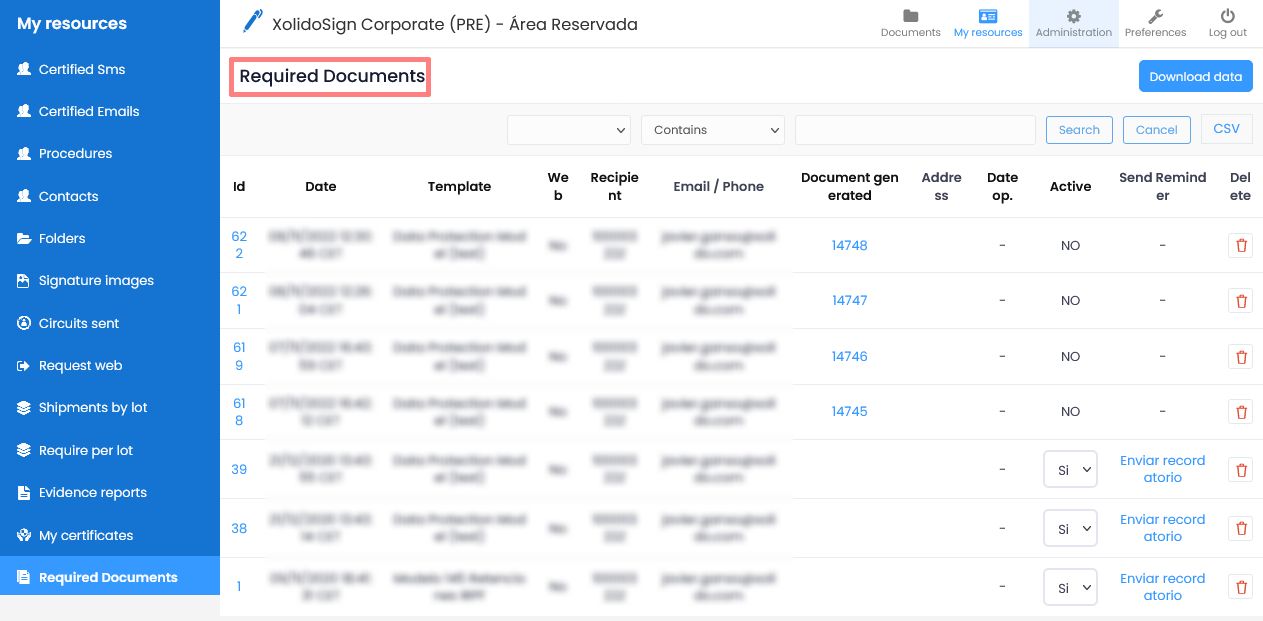
Required Documents
You'll be able to see if the document has been generated, send a reminder to recipients who haven't completed the submitted form, generate a report with evidence of the requested submission, and so on.
Once the recipient completes the form and generates the document, it will appear in the Documents tray, where we can track whether the recipient has completed the requested signature, approval, notification, etc.
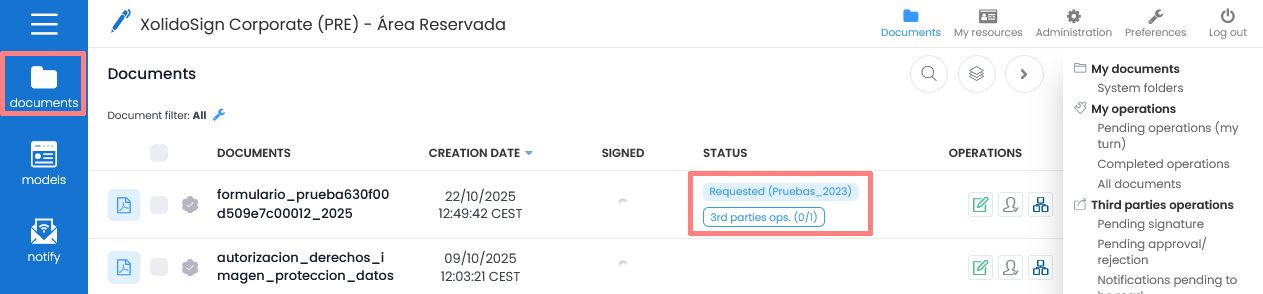
In the image you can see three documents generated through a "Require" the Status column shows the following information:
- Requerido (Pruebas_2023): The document was generated through a submission to the recipient using the "Request" functionality. The template requested was "Tests_2023".
- Op. Terceros (0/1): The recipient has been asked to perform an operation on the document once they complete and generate it, which may be an electronic signature, an approval, a notification, etc., and they have not yet done so.
Contact our Support and User Experience Department at soporte@xolidosign.com
Send email
Xolido products
IT infrastructure and cloud services
About us