
FAQ XolidoSign
CVE operation in XolidoSign Professional and way to verify a document
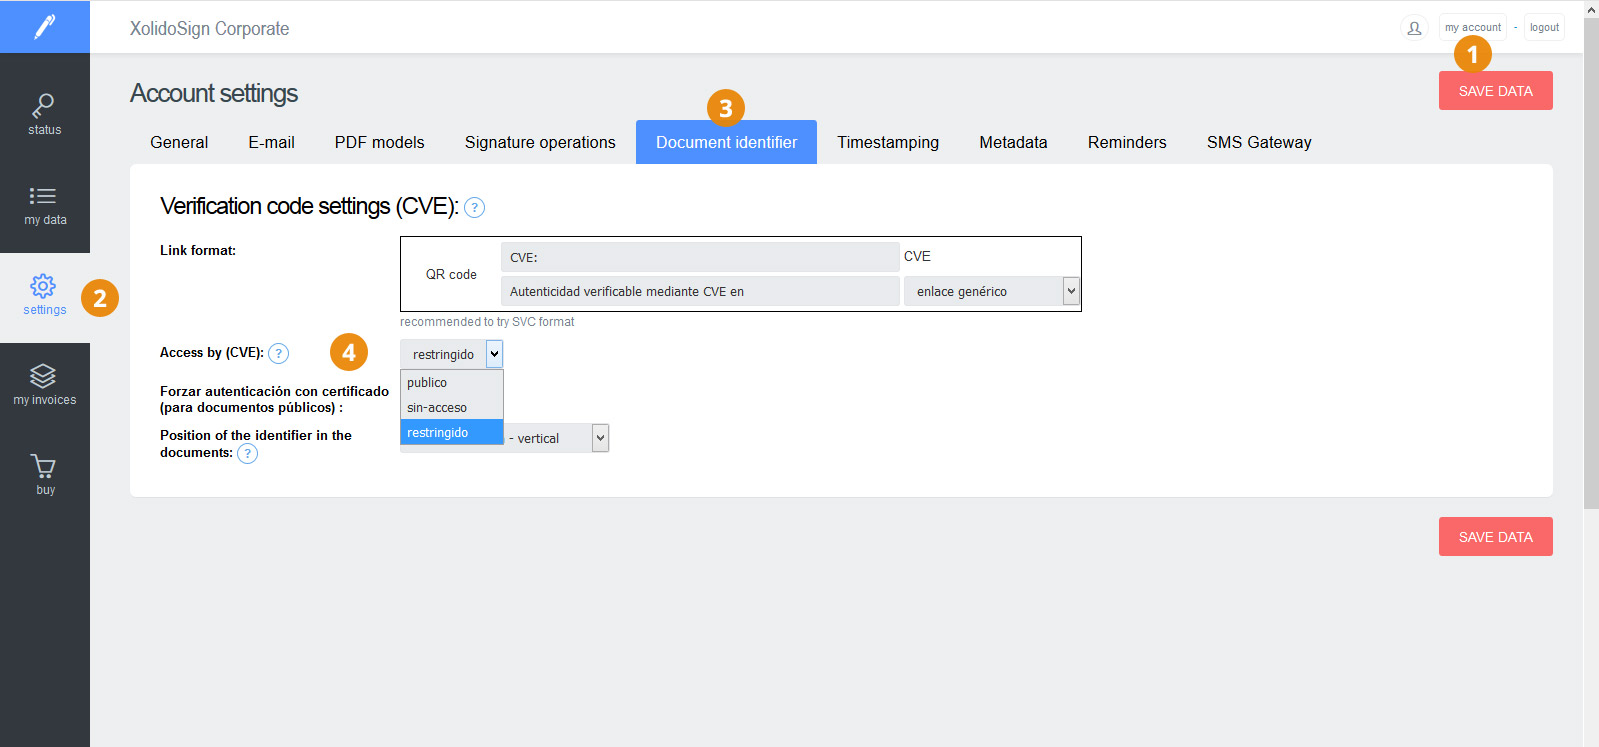
1. Configure CVE in administration zone.
The XolidoSign Professional service administrator can configure the CVE policy that will be used by default in all documents uploaded to the application. To do this go to My Account > Settings > Document Identifier.
Policy options of document access that can be configured are (Field "Access by CVE"):
- Public: Anyone with the CVE can access the document.
The option to force the authentication to access the document to be with an electronic certificate will be included soon, as XolidoSign Professional is currently configured. - Restricted: Only users (NIF) who have the document associated can access it. Users are associated through their NIF to the document itself (document tab > document access tab).
- No access: No one can access the document from the CVE.
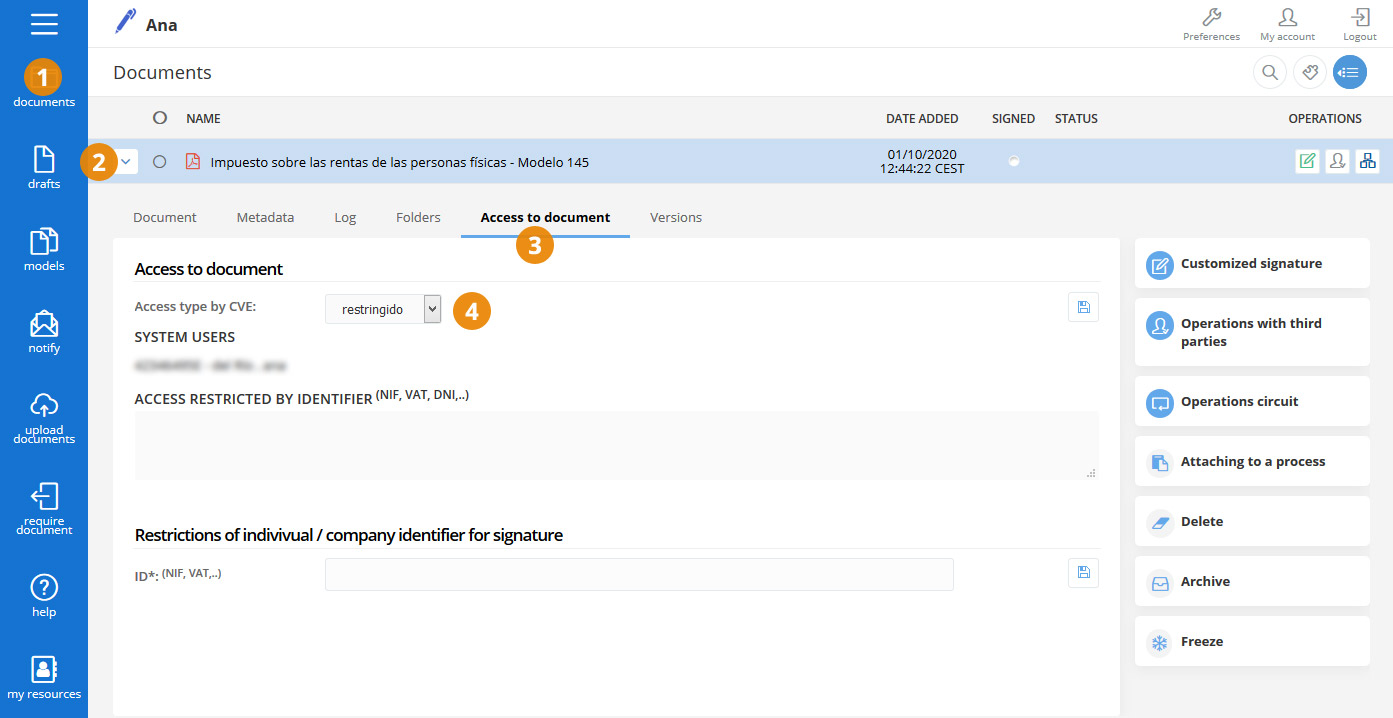
2. Modify the access policy by CVE for each document.
In the public area of XolidoSign Professional, user can modify the access policy by CVE that has been defined by default in the administration area, from the tab of each document.
Document tab > Document access
In the drop-down "Type of access by CVE" select the policy that you want to apply to the document and save.
In case of "Restricted" access, indicate in "Access restricted by identifier" field the NIFs that will have access to the document and save. In this case, people who wish to verify the document will have to access an electronic certificate that contains any of the restricted NIFs.
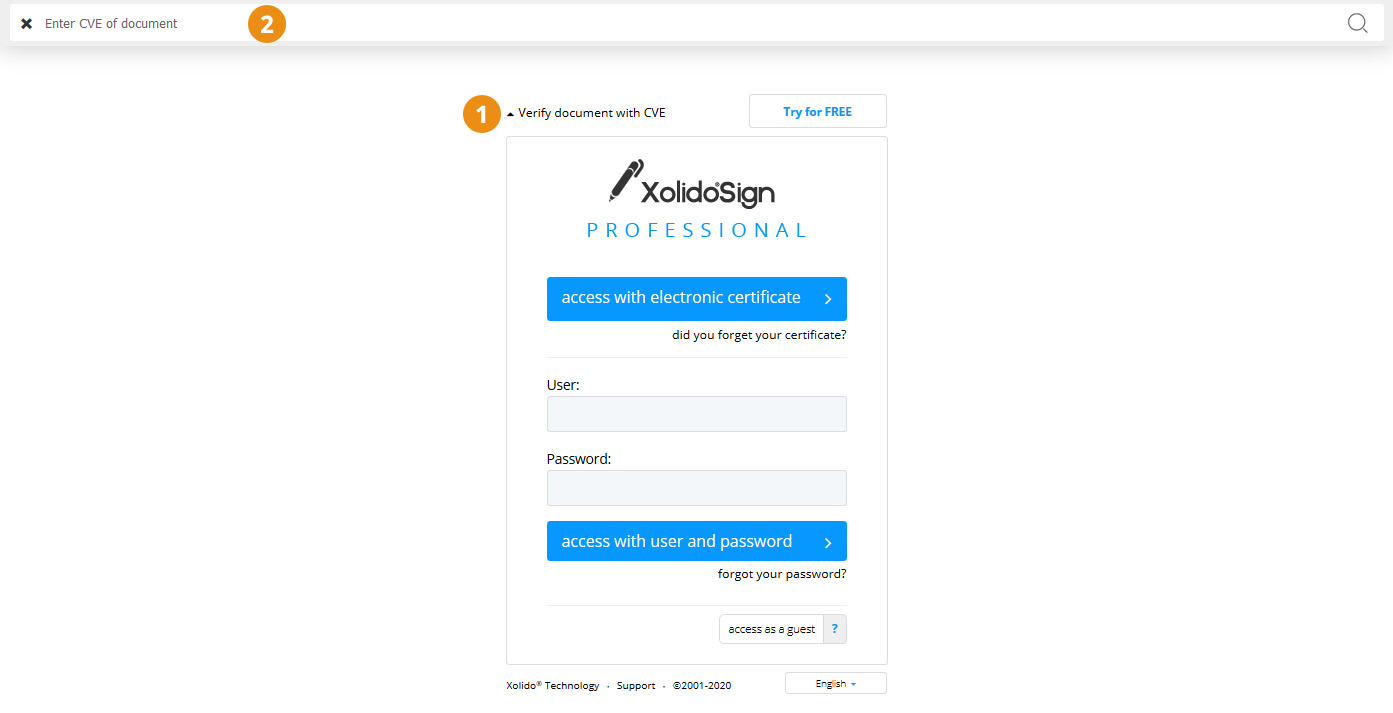
3. Verify document in XolidoSign Professional.
The documents generated or uploaded to XolidoSign Professional application can be verified through the search engine available on the login page of your XolidoSign Professional (https://professional.xolidosign.com).
Click on "Verify documents with CVE" and then enter the CVE of the document in the search engine.
XolidoSign Solutions

Xolido products
IT infrastructure and cloud services
About us